PCoIP Proxy - NetScaler Gateway 12 / Citrix Gateway 12.1
Navigation
- Change Log
- Overview
- Prerequisites
- PCoIP Profile
- Session Policy/Profile
- Gateway Virtual Server
- Horizon Configuration
- Update Content Switching Expression for Unified Gateway
- Use Citrix Gateway PCoIP Proxy
- CLI Commands
Change Log
- 2018 Dec 22 - renamed NetScaler Gateway to Citrix Gateway
- 2018 Oct 7 - updated screenshots for Citrix Gateway 12.1
- Horizon Configuration - 12.1 build 49 supports USB redirection with PCoIP
Overview
NetScaler Gateway 12.0 and Citrix Gateway 12.1 and newer support the PC-over-IP (PCoIP) protocol, which is the remote display protocol for several non-Citrix VDI solutions, including VMware Horizon. PCoIP is analogous to Citrix HDX/ICA protocol, and Microsoft RDP protocol. PCoIP uses UDP port 4172.
- VMware Blast is currently not supported
When PCoIP is proxied through Citrix Gateway, Citrix Gateway can replace the traditional PCoIP remote access solutions, like Horizon Security Server, or VMware Unified Access Gateway.
Prerequisites
- NetScaler Version - NetScaler 12.0 or newer.
- Build 51 and newer for NAT
- NetScaler Edition – PCoIP Proxy is available in all NetScaler Editions
- Universal Licenses - PCoIP Proxy uses the Clientless Access feature of Citrix Gateway, which means every Citrix Gateway connection must be licensed for Citrix Gateway Universal. On the Citrix Gateway Virtual Server, ensure ICA Only is unchecked.
- Horizon infrastructure - A functioning internal Horizon infrastructure. Ensure you can connect to Horizon Agents internally without Citrix Gateway.
- Ensure that the Horizon HTTP(S) Secure Tunnel and PCoIP Secure Gateway are not enabled on the Horizon Connection Servers that NetScaler will proxy connections to.
- Configure Desktop Pools and RDS Farms to use PCoIP as the default protocol.
- Firewall Ports:
- TCP 4172, UDP 4172, and TCP 443 open from Horizon Clients to the Citrix Gateway VIP.
- TCP 4172, and UDP 4172 open from the NetScaler SNIP to all internal Horizon Agents.
- Certificate – A valid certificate for the Citrix Gateway Virtual Server.
- Authentication – An LDAP authentication policy/server.
- Unified Gateway (optional) – If Unified Gateway, create the Unified Gateway before adding PCoIP functionality.
- RfWebUI Portal Theme – For web browser access to Horizon, the Citrix Gateway Virtual Server must be configured with the RfWebUI theme.
- Horizon Client – The Horizon Client must be installed on the client device, even if accessing Horizon published icons using the NetScaler RfWebUI portal.
PCoIP Profile
To create the PCoIP Profile:
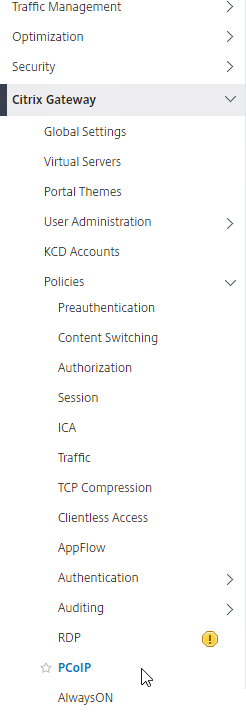
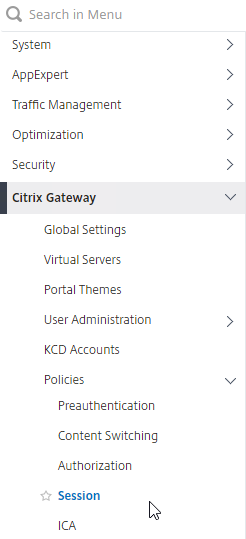
- In the NetScaler management GUI, navigate to Citrix Gateway > Policies> PCoIP.
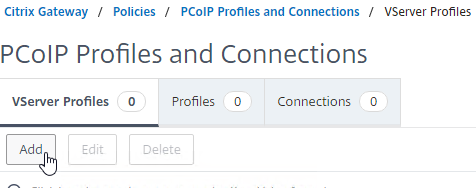
- On the right, in the PCoIP Profiles and Connections pane, you will create a VServer profile and a PCoIP profile.
- To create a VServer profile, on the VServer Profiles tab, click Add.
- Enter a name for the VServer profile. The only purpose of the VServer Profile is to specify the Active Directory domain name so name it accordingly.
- Enter an Active Directory Domain Name that will be used for Single Sign-on to Horizon Connection Server, and then click Create.
- Note: only a single Active Directory domain is supported per NetScaler Gateway Virtual Server. Also, the domain name specified here is displayed in the Horizon Client.

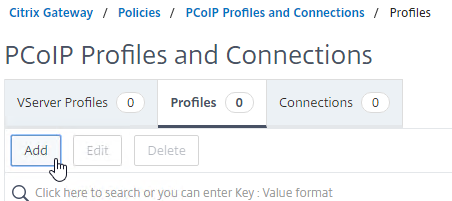
- To create a PCoIP profile, on the Profiles tab, click Add.
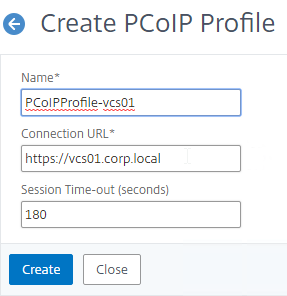
- Enter a name for the PCoIP Profile. The PCoIP Profile specifies the internal DNS name for Horizon so name it accordingly.
- Enter the internal connection URL for the internal VMware Horizon View Connection Servers, and then click Create. NetScaler SNIP needs to be able to connect to this URL.
Session Policy/Profile
To create or edit a Session Policy/Profile that has PCoIP Proxy enabled:
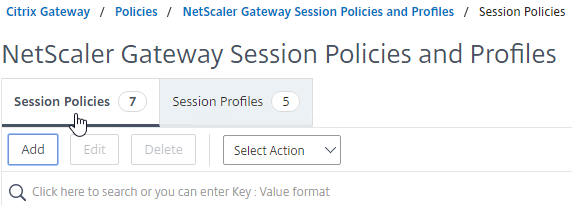
- Navigate to Citrix Gateway > Policies> Session.
- On the right, select the Session Profiles tab.
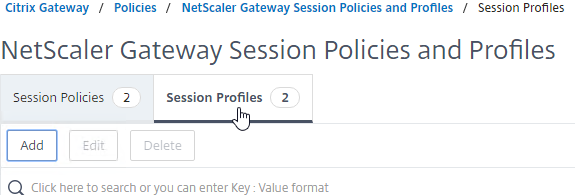
- On the NetScaler Gateway Session Policies and Profiles page, create or edit a NetScaler Gateway Session Profile.
- To create a NetScaler Gateway session profile, click Add, and provide a name.
- To edit a NetScaler Gateway session profile, select the profile, and click Edit.

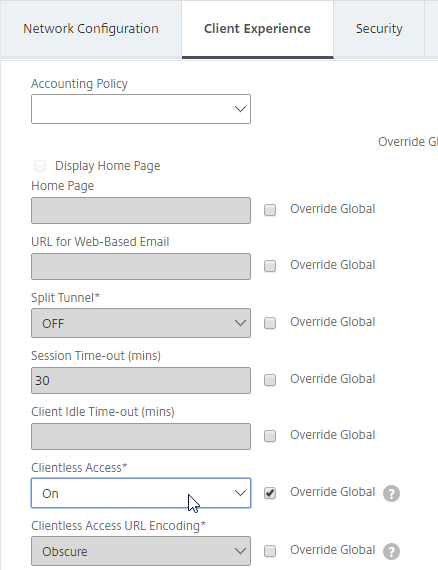
- On the Client Experience tab, ensure that the Clientless Access value is set to On.
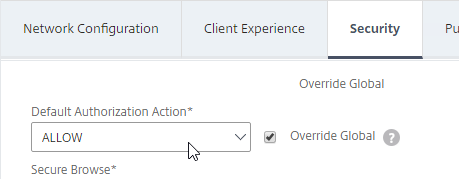
- On the Security tab, ensure that the Default Authorization Action value is set to ALLOW.
- On the PCoIP tab, select the required PCoIP profile. Note: you can also create or edit PCoIP Profiles from this tab.
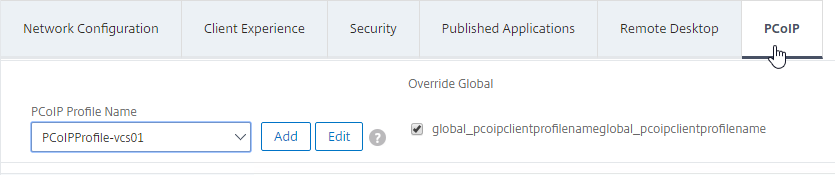
- Click Create or OK to finish creating or editing the Session Profile.

- If you created a new Session Profile, then you must also create a corresponding Session Policy.
- Navigate to Configuration > Citrix Gateway > Policies > Session.
- On the right, select the Session Policies tab.
- Click Add.
- Provide a name for the Session Policy, and select the required session profile name from the Profile drop-down.
- In the Expression area, type true (Default Syntax, or Advanced Policy), and then click Create.

Gateway Virtual Server
Bind the created PCoIP VServer profile and Session Policy to a Citrix Gateway Virtual Server:
- Go to Citrix Gateway > Virtual Servers.
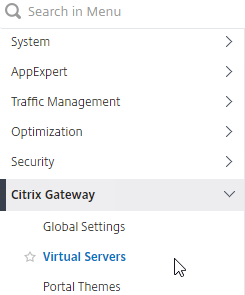
- On the right, either Add a new Citrix Gateway Virtual Server, or Edit an existing Citrix Gateway Virtual Server.

- If you are editing an existing Citrix Gateway Virtual Server, in the Basic Settings section, click the pencil icon.

- For both adding and editing, in the Basic Settings section, click More.
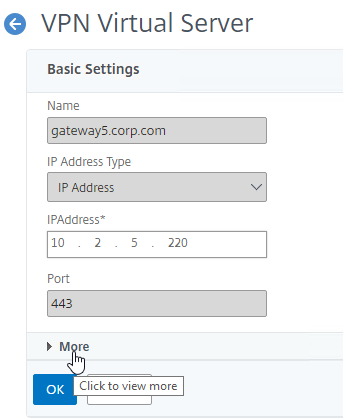
- Use the PCoIP VServer Profile drop-down to select the required PCoIP VServer Profile.
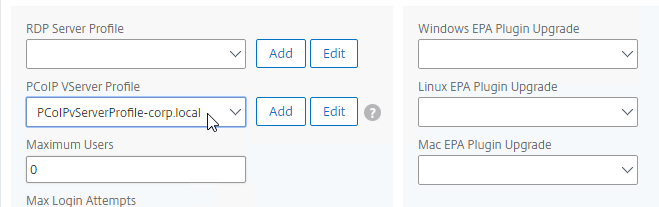
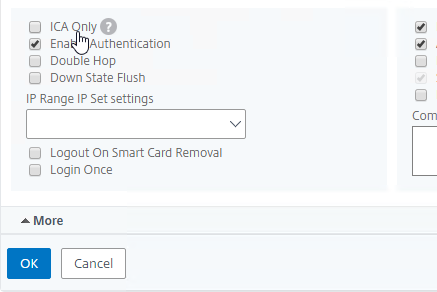
- Scroll down and ensure that ICA Only is unchecked. Then click OK to close the Basic Settings section.
- If you are creating a new Citrix Gateway Virtual Server, bind a certificate, and bind an LDAP authentication policy.
- Then scroll down to the Policies section and click the plus icon.

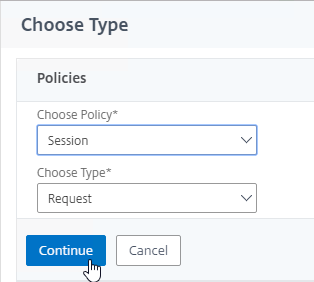
- The Choose Type page defaults to Session and Request. Click Continue.
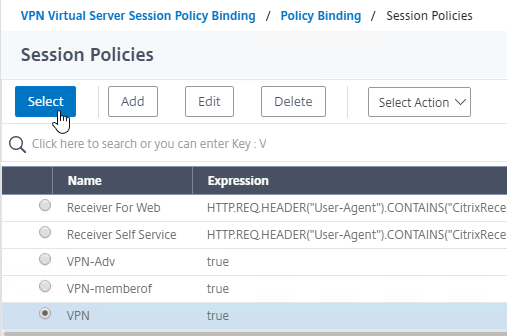
- In the Policy Binding section, click on Click to select.
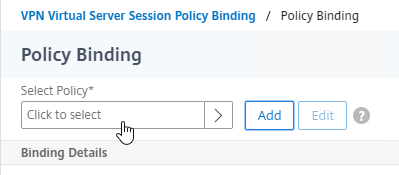
- Click the radio button next to the required Session Policy that has the PCoIP Profile configured, and then click the blue Select button at the top of the window.
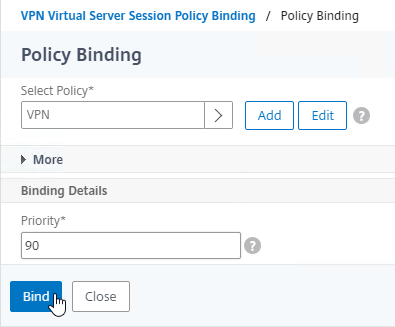
- Back in the Policy Binding page, click Bind.
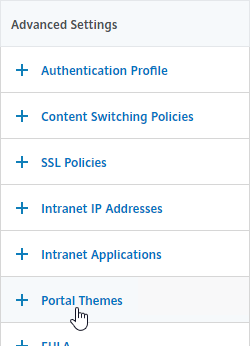
- If you want to use a web browser to connect to VMware Horizon, then on the right, under Advanced Settings, add the Portal Themes section. If you are only using Horizon Client to connect to Citrix Gateway, then you don’t need to perform this step.
- Use the Portal Theme drop-down to select RfWebUI, and click OK.
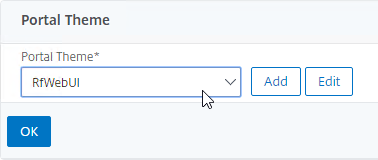
- Horizon published icons are added to the RfWebUI portal.
- Use the Portal Theme drop-down to select RfWebUI, and click OK.
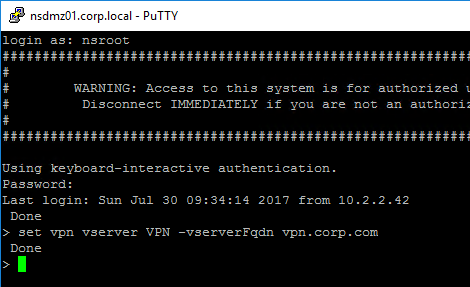
- To enable support for NAT, SSH to the NetScaler to access the CLI.
- Run the command set vpn vserver MyVserverName -vserverFqdn MyFQDN. This causes NetScaler to send the FQDN back to the Horizon Client, which enables it to connect to the public IP instead of the DMZ private IP address. Unfortunately, this setting is not available in the NetScaler GUI.
- Run the command set vpn vserver MyVserverName -vserverFqdn MyFQDN. This causes NetScaler to send the FQDN back to the Horizon Client, which enables it to connect to the public IP instead of the DMZ private IP address. Unfortunately, this setting is not available in the NetScaler GUI.
Horizon Configuration
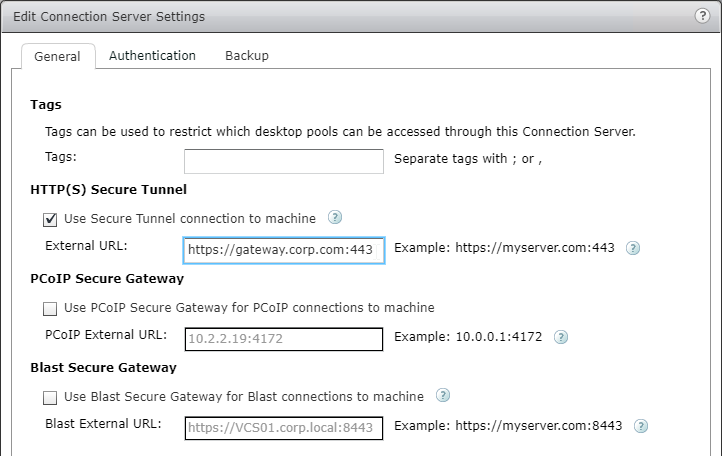
- In Horizon Administrator, go to View Configuration > Servers. Edit the Horizon Connection Server that Citrix Gateway connects to.

- On the General tab, uncheck PCoIP Secure Gateway.
- In Citrix Gateway 12.1 build 49 and newer, to enable USB Redirection, enable the HTTP(S) Secure Tunnel and enter the external FQDN for Citrix Gateway.
- Click OK when done.
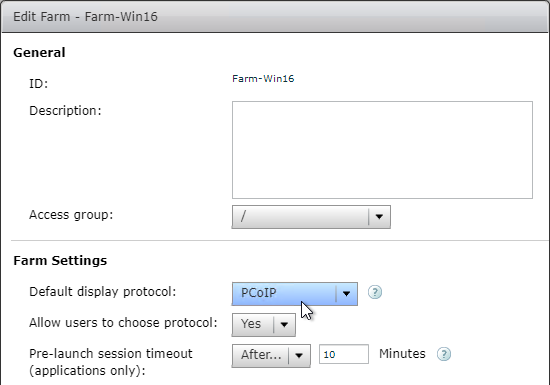
- At Resources > Farms, edit your RDS Farms.
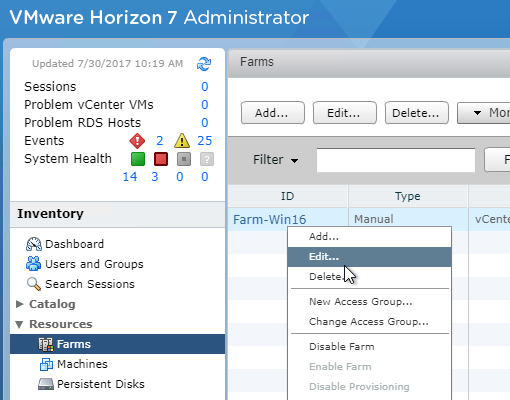
- Set the Default display protocol to PCoIP.
- Set the Default display protocol to PCoIP.
Update Content Switching Expression for Unified Gateway
If your Citrix Gateway Virtual Server is behind a Unified Gateway (Content Switching Virtual Server), then you must update the Content Switching Expression to include the PCoIP URL paths.
- In the NetScaler GUI, navigate to Configuration> Traffic Management > Content Switching > Policies.
- On the right, select the Unified Gateway Content Switching Policy, and then click Edit.
-
Append the following expression under the Expression area, and then click OK.
Use Citrix Gateway PCoIP Proxy
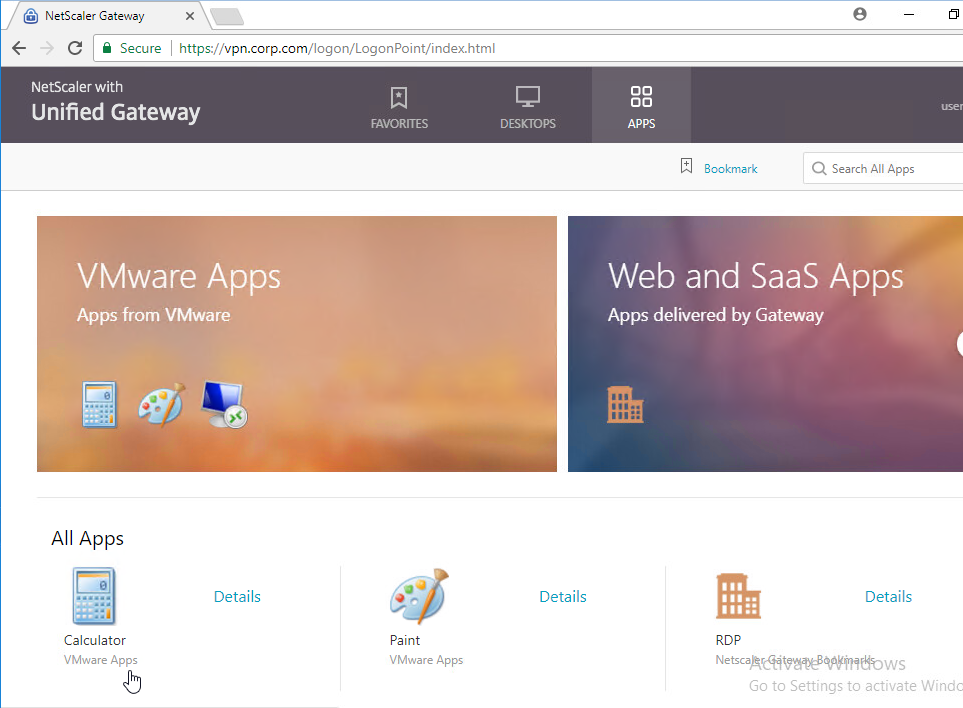
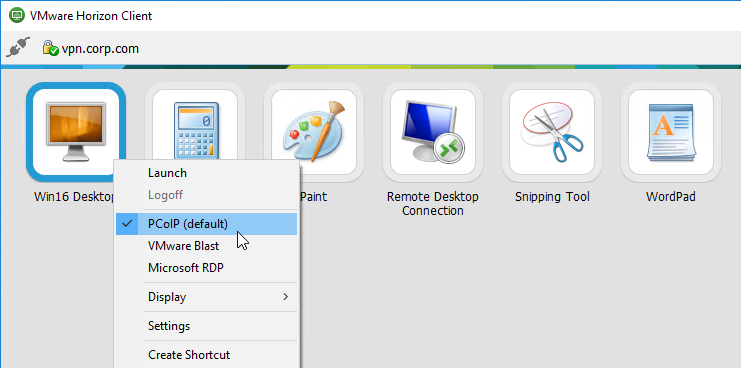
- To connect, you must have Horizon View Client installed on the client device. Once installed, you can either use the Horizon View Client’s User Interface to connect to Citrix Gateway, or you can use the Citrix Gateway RfWebUI portal page to view the icons published from Horizon.
- To view the active PCoIP connections, in NetScaler, go to Citrix Gateway > Policies > PCoIP.
- On the right, switch to the Connections tab. The active sessions are displayed with the following data: user name, Horizon View Client IP, and Horizon View Agent Destination IP.
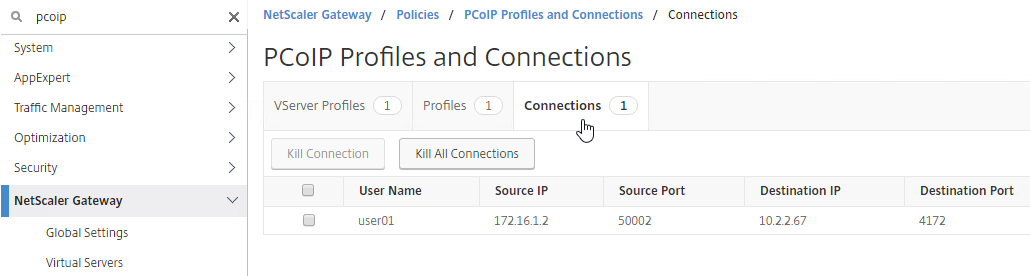
- To terminate a connection, right-click the connection, and click Kill Connection. Or click Kill All Connnections to terminate all PCoIP connections.

CLI Commands
Here are CLI Commands for the configuration shown above.
add ssl certKey WildcardCorpCom -cert WildcardCorpCom.pfx -key WildcardCorpCom.pfx -inform PFX -passcrypt "abc"

add authentication ldapAction AD01 -serverIP 10.2.2.11 -serverPort 636 -ldapBase "dc=corp,dc=local" -ldapBindDn ctxsvc@corp.local -ldapBindDnPassword abc -encrypted -encryptmethod ENCMTHD_3 -ldapLoginName sAMAccountName -groupAttrName memberOf -subAttributeName cn -secType SSL
add authentication ldapPolicy AD01 ns_true AD01

add vpn pcoipVserverProfile corp -loginDomain corp
add vpn pcoipProfile vcs01 -conServerUrl "https://vcs01.corp.local"

add vpn sessionAction VPN -defaultAuthorizationAction ALLOW -clientlessVpnMode ON -pcoipProfileName vcs01
add vpn sessionPolicy VPN true VPN

add vpn vserver VPN SSL 10.3.3.13 443 -downStateFlush DISABLED -Listenpolicy NONE -vserverFqdn vpn.corp.com -pcoipVserverProfileName corp

bind vpn vserver VPN -portaltheme RfWebUI
bind vpn vserver VPN -policy AD01 -priority 100
bind vpn vserver VPN -policy VPN -priority 100 -gotoPriorityExpression NEXT -type REQUEST -urlName RDP
bind ssl vserver VPN -certkeyName WildcardCorpCom